Repeat patterns in Procreate: mastering the trailing floral
- jasminehnatkova
- Nov 8, 2024
- 5 min read
Updated: May 1
A step by step approach that will give you stunning results!
For a long time I was stumped by trailing patterns in Procreate, and got myself in knots trying to work out how to do it.
Sometimes I would strike lucky, but could never replicate what I had done without lots of trial, error and frustration!
That's why I took some time to make myself a template and a simple method that would work every time and I am so excited to share it with you today!

To create this pattern you will need to download the template below.
You can then follow along by watching the video toturial , or keep scrolling down for a step by step guide.
What is a trailing floral pattern?
A trailing pattern is one where an element of the pattern, often a stem or branch, makes a continuous line throughout the pattern meaning it repeats indefinitely.
It can be tricky to achieve as you need to find a way to ensure the continuous element repeats seamlessly when it goes off the canvas in Procreate.
Why use a template?
If you've followed along with my tutorials for any period of time you will know that I love to create patterns using a template!
Often a template is just a shape to design within, but the template I've created for you today is much more detailed and gives you a shortcut to creating a really stunning trailing pattern.
You can still create your pattern using your own style, colours and brushes and because everyone's style is different you will still create something totally unique which you can upload to your print on demand sites or add to your portfolio.
Step 1 - set up your canvas
When I make patterns I nearly always set up my canvas at 12x12 inches at 300 dpi.
Locate the trailing template and import it into your canvas so it fills up the whole square.
When I'm using a template I usually decrease the opacity in the layers panel so it is a bit fainter.
Then create a new layer above the template.

Step 2 - Create your trailing stem
This step is actually the most important step of the whole process. Once you have this sorted, the rest of the pattern is plain sailing!
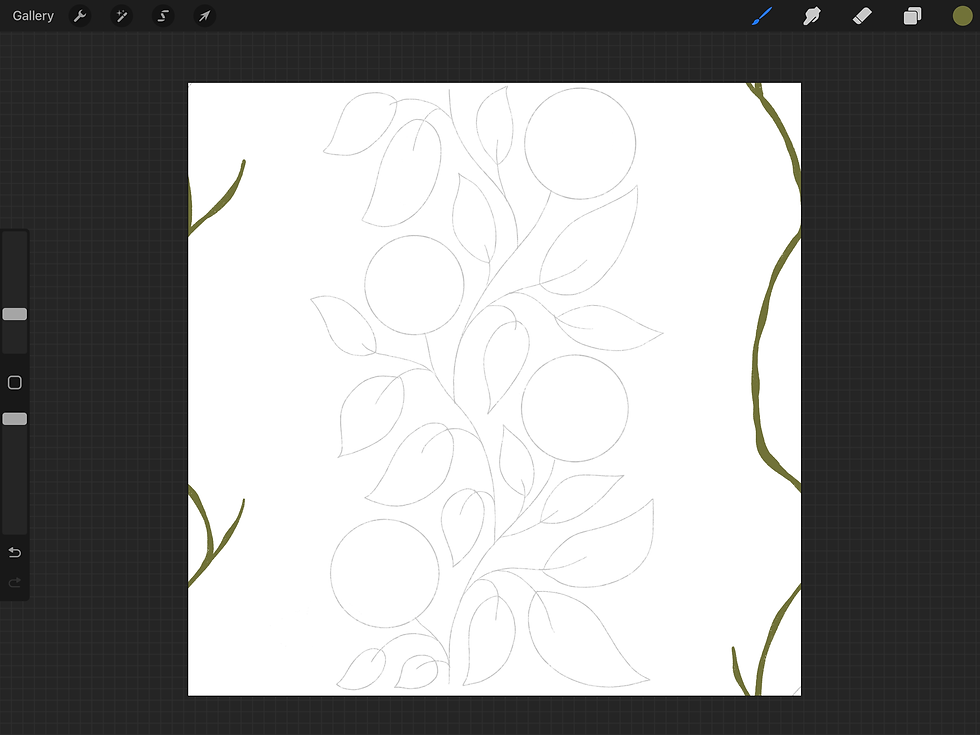
Firstly with a brush and colour of your choice trace over the main stem of the template.

It will make it much simpler later if you add some variation to the stem as you can see below - some thicker and thinner parts. You don't have to, but with a single width line it can be harder to join it up perfectly when you make the repeat.

Now make a diagonal line in the top left and bottom right corners. This will be deleted later on, but will ensure you select the whole canvas when making the repeat.

Now duplicate the layer three times so you have four identical stem layers.

With magnetics and snapping on move each layer to each of the four corners. When it gets to the correct place orange lines should appear.

You should be left with something like this. Merge the four stem layers together and rub out the diagonal lines which will be in the middle of the canvas.

Now you can fix the line where there is a gap. You can see now how it helps if there is some variation in the width of the stem as it is easier to join the two together.
Now you need to do the same process as we just did to get the stem back where it was originally. Firstly duplicate the stem layer three more times so you have four identical layers.

With snapping and magnetics on, move each layer to the corner. When the orange lines come up, you've got the right place!

Once you've done this, your stem should be back where you drew it originally except this time it will be joined at the top and bottom. Merge the 4 stem layers together again.

If you're still following, congratulations!! The hard part is done and the fun bit is now to come!
Step 3 - create your pattern
In this step, just use the template as a guide and create your pattern!
It's best to create different colours on different layers so that you have the flexibility to change things easily if you need to.
You can really let your own style and interests shine through in this stage!

I also added a background colour.

Before moving onto the next step, it would be a good idea to save your document to your files as a Procreate file. In the next stage we will need to merge all our layers and then it will be impossible to go back.
If you save it now as a Procreate document you can always come back to this point and change colours or change the position of your elements.
As well as doing this I also duplicate the canvas within Procreate and continue working on the duplicated canvas so I can come back easily to this stage if I need to tweak the positioning of anything once I've tested the repeat.
Step 4 - Create the repeat
There are a few more technical steps to go, but you're so nearly there! It's all going to come together in a short while and it will be so exciting to see!
Firstly, delete your template layer and merge together all the other layers of your pattern (except the background layer - keep that separate at all times!)

Make a diagonal mark in the top left and bottom right.

Duplicate the layer 4 more times so you have 5 identical layers.

As we have done before, with snapping and magnetics on, move each layer to the corner, making sure it snaps in the middle. One layer should remain where it is.

You can see by looking at the layers panel below that on top I have the 4 layers which I dragged to each corner. And one below which is the original design.

Merge the top four layers together leaving the original design on its own separate layer.

The last thing that needs to be done is to rub out the diagonal markings we made. Firslty hide the middle layer in the layers panel and rub out the marks in the middle.

Then hide the outside layer and rub out the marks in the two corners.

Congratulations! You have finished!
Well done if you made it through to the end, there were quite a few technical steps to follow but once you've done it a couple of times, it's not tricky.
You can also start branching out (no pun intended!) from the template when you are a little more confident. For example, instead of the flowers you could add butterflies or bees, and you could exchange the leaves for something else too.
More Pattern Templates for Procreate
If you've enjoyed using this template and would like some more I have just the thing for you! Take a look at my pack of 20 Pattern Templates.

I can't wait to see what you create! If you'd like to share your work with me, I'd love to see it. You can share using the hastag #patternswithjas on instagram and tag me too @jasminehnatkova I always love to see what you create with these tutorials.
Drop me a line in the comments if you've enjoyed this tutorial or if you have any questions!


Hi Jasmine, thank you so much for this beautiful tutorial. I’m having trouble finishing mine. I’ve undone a couple of times as I try to figure it out. Here’s a photo of the step where the stem should be back where it was originally.
Which layer should I select first, and to which corner should I move each layer?
Thank you so much!
Great tutorial. So easy to follow. I made my first pattern and am pretty proud of it. Do you have any other templates you could share so I can keep practicing?
Hello Jasmine,
thank you so much for this tutorial. :)
I do have a question - Right at the end of the process, what do I do with the layers? Do I merge the centre and the left and right layers? I exported and loaded into Spoonflower, but the repeat pattern hasn't worked.
I don't plan to sell this design as I have used your template, but I wanted to test it out in Spoonflower incase I had it correct.
Thank you so much
Sherri
Great template and tut, Jasmine. Thanks so much. 😁